
In the article, we will be focusing on sending SMS to mobile using laravel notification. We will use Nexmo API for sending SMS notification in development environment. Since this is a continuation from the previous article about sending email notification in laravel, I will not go through the basic setup. You can check the setup in the previous article linked above.
Getting Nexmo Credentials
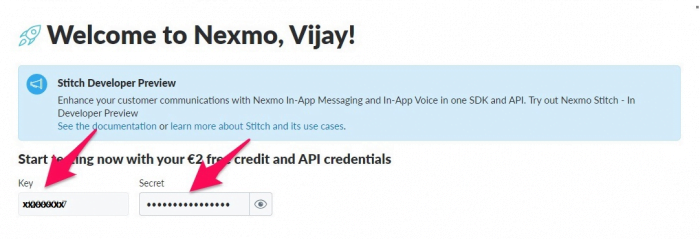
For this article, we will use a Nexmo API. Before diving into the code, let’s get our required API credentials from Nexmo. For this, you need to signup for Nexmo. Fill up the forms with required details, after you complete your registration, you will be redirected to dashboard where you will get your API credentials.
Install Nexmo Client package.
To use Nexmo API, we need to install it’s client package. We will use composer to install it. Run the command:
composer require nexmo/client
Nexmo Configuraton
After installing nexmo client, we need to add configuration in services.php with nexmo credentials. So, After modifying, our services.php looks have following code:
'nexmo' => [
    'key' => 'NEXMO_KEY',
    'secret' => 'NEXMO_SECRET',
    'sms_from' => 'SENDER_NAME',
],
Now, we need to setup these credentials in our .env file. Simply, add the following code in your .env file.
NEXMO_KEY=NEXMO_SECRET= NEXMO_NUMBER=
Modify Migration
Since we will use laravel default User model, we need a field for storing phone number of user. So, we will add a column in users table. Our Users table migration looks like below:
// ./database/migrations/...create_users_table.php
....
Schema::create('users', function (Blueprint $table) {
    $table->increments('id');
    $table->string('name');
    $table->string('email')->unique();
    $table->string('phone')->nullable();
    $table->string('password');
    $table->rememberToken();
    $table->timestamps();
});
.....
Create Notification
We need to create a notification to send sms through notification. To create it, run the following artisan command:
php artisan make:notification AccountCreatedSMS
This will create a new file AccountCreatedSMS in App/Notification/ directory. If you dig into that file, you need to note two methods i.e. via method and toMail method.
The via method is used to determine which channels the notification will be delivered like emails, SMS, and Slack. We will change the default via method. So, our via method looks like below:
public function via($notifiable)
{
    return ['nexmo'];
}
Similarly, we will add new method toNexmo to send sms notification.
// use Illuminate\Notifications\Messages\NexmoMessage;

public function toNexmo($notifiable)
{
    return (new NexmoMessage)
        ->content('Congratulation! New acount created at Kodementor');
}
Thus, our complete notification file looks like below:
user = $user;
    }

    /**
     * Get the notification's delivery channels.
     *
     * @param  mixed  $notifiable
     * @return array
     */
    public function via($notifiable)
    {
        return ['nexmo'];
    }

    /**
     * Get the mail representation of the notification.
     *
     * @param  mixed  $notifiable
     * @return \Illuminate\Notifications\Messages\MailMessage
     */
    public function toMail($notifiable)
    {
        return (new MailMessage)
                    ->line('The introduction to the notification.')
                    ->action('Notification Action', url('/'))
                    ->line('Thank you for using our application!');
    }

    /**
     * Send the SMS notification
     * @param  mixed $notifiable
     * @return NexmoMessage
     */
    public function toNexmo($notifiable)
    {
        return (new NexmoMessage)
            ->content('Congratulation! New acount created at Kodementor');
    }

    /**
     * Get the array representation of the notification.
     *
     * @param  mixed  $notifiable
     * @return array
     */
    public function toArray($notifiable)
    {
        return [
            //
        ];
    }
}
Configure Model
For sending SMS notification, respective model should use Notifiable trait. The User model already uses this trait, so we don’t need to change it. But, if you wish to implement in other models, you need to use that trait.
Edit Blade for Number
We need to add a separate field for mobile number of user. Simply add a new field below your email address field as below:
.........@if ($errors->has('phone')) {{ $errors->first('phone') }} @endifSending Notification
After all our setup, we need to fire our notification. We will send sms notification after user is registered. Thus, we changed our controller file accordingly. Our final controller file looks like below:
middleware('guest'); } /** * Get a validator for an incoming registration request. * * @param array $data * @return \Illuminate\Contracts\Validation\Validator */ protected function validator(array $data) { return Validator::make($data, [ 'name' => 'required|string|max:255', 'email' => 'required|string|email|max:255|unique:users', 'password' => 'required|string|min:6|confirmed', ]); } /** * Create a new user instance after a valid registration. * * @param array $data * @return \App\User */ protected function create(array $data) { $user = User::create([ 'name' => $data['name'], 'email' => $data['email'], 'phone' => $data['phone'], 'password' => bcrypt($data['password']), ]); $user->notify(new AccountCreatedSMS($user)); return $user; } }This is all for SMS notification in laravel. After a new user is created, it will send a new SMS to the respective phone number. But, keep in mind that you need to provide a phone number with country code. You can official documentation from Nexmo at this link https://developer.nexmo.com/documentation.
Thank you for reading this article. If you like this article, please consider sharing it 🙂


