
Most of the web applications use image uploads features whether they are a small or large application. In this article, we will create a form which accepts multiple images and saves it in our database.
We will resize our image so that all of the uploaded image same aspect ration. Moreover, we will create a thumbnail for each image which can be used to display in frontend which loads faster. We will use Laravel 5.7 and Intervention package for this.
Creating Project
We will install a fresh copy of laravel 5.7. At the time of writing this article, laravel 5.7 has not been released. We will install development version. Run the command:
composer create-project laravel/laravel kodementor dev-develop
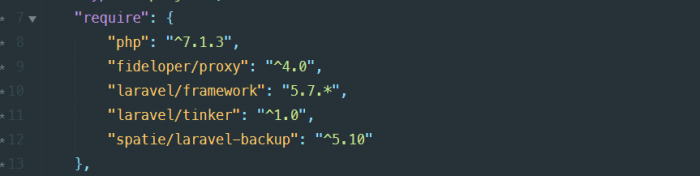
The Composer.json file looks as below:
Install Intervention/Image
we are going to use Intervention Image package for manipulating images. We will install it via composer. Run the command:
composer require intervention/image
After installing Intervention Image, we need to add service providers and facade. Let’s open our config/app.php file and add following lines.
In the $providers array add the service providers for this package.
Intervention\Image\ImageServiceProvider::class
Add the facade of this package to the $aliases array.
'Image' => Intervention\Image\Facades\Image::class
And finally publish the configuration using following command:
$ php artisan vendor:publish --provider="Intervention\Image\ImageServiceProviderLaravel5"
Model and Migration
We will use a table named photos in database. Let’s create a model and migration at once. Run the command below:
php artisan make:model Photo -m
Open our newly created migration file and add some columns for image. Our migration looks like below:
public function up()
{
    Schema::create('photos', function (Blueprint $table) {
        $table->increments('id');
        $table->string('image');
        $table->string('thumbnail');
        $table->timestamps();
    });
}
Now, we change our model so that we can insert some data. Add fillable type so that our model looks like below.
After these setup, migrate our table.
php artisan migrateRoute Setup
After migrating our table, let's setup our route to access our form. Add below route in your web.php file.
Route::get('photo', 'PhotoController@index')->name('photo'); Route::post('photo', 'PhotoController@uploadImage');Create Blade
We will create a blade file which include a form input of type
file. We will extends laravel's default template.@extends('layouts.app') @section('content')@endsectionUpload Multiple Images
@if (count($errors) > 0)Please correct following errors:@endif@foreach ($errors->all() as $error)
- {{ $error }}
@endforeach
Listing Images
@forelse($photos as $photo)@empty No image found @endforelse
Create Controller
Now, it's time to do some logic in controller. Let's create a new controller called
PhotoController.php artisan make:controller PhotoControllerIt's time to modify our controller by adding some methods. We will add first method called
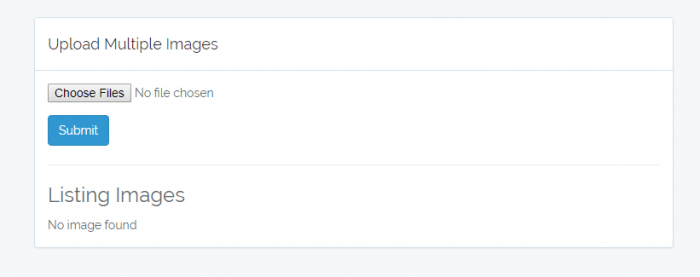
indexto see our frontend. Add the following code in PhotoController.public function index() { $photos = Photo::all(); return view('photo', compact('photos')); }If we navigate to the route
/photo, we will see as the following.
We need to add another method for handling our form request. We named it
uploadImage. I have added some code inside it and commented each line to make it readable. Thus, our final controller file looks like below:photo = $photo; } /** * Display photo input and recent images * @return view [description] */ public function index() { $photos = Photo::all(); return view('photo', compact('photos')); } public function uploadImage(Request $request) { $request->validate([ 'image' => 'required', 'image.*' => 'image|mimes:jpeg,png,jpg,gif,svg|max:2048' ]); //check if image exist if ($request->hasFile('image')) { $images = $request->file('image'); //setting flag for condition $org_img = $thm_img = true; // create new directory for uploading image if doesn't exist if( ! File::exists('images/originals/')) { $org_img = File::makeDirectory('images/originals/', 0777, true); } if ( ! File::exists('images/thumbnails/')) { $thm_img = File::makeDirectory('images/thumbnails', 0777, true); } // loop through each image to save and upload foreach($images as $key => $image) { //create new instance of Photo class $newPhoto = new $this->photo; //get file name of image and concatenate with 4 random integer for unique $filename = rand(1111,9999).time().'.'.$image->getClientOriginalExtension(); //path of image for upload $org_path = 'images/originals/' . $filename; $thm_path = 'images/thumbnails/' . $filename; $newPhoto->image = 'images/originals/'.$filename; $newPhoto->thumbnail = 'images/thumbnails/'.$filename; //don't upload file when unable to save name to database if ( ! $newPhoto->save()) { return false; } // upload image to server if (($org_img && $thm_img) == true) { Image::make($image)->fit(900, 500, function ($constraint) { $constraint->upsize(); })->save($org_path); Image::make($image)->fit(270, 160, function ($constraint) { $constraint->upsize(); })->save($thm_path); } } } return redirect()->action('PhotoController@index'); } }Testing
We have successfully integrated multiple image upload in our system. Now, let's test it if it works. First of all, navigate to the route
/photo. We will see a form with image upload input.Below is a screenshot of validation error for image type and size.
We can upload multiple multiple files and see them listed below the input form as the screenshot below:
Conclusion
That is all for uploading multiple images in our system. We have used a popular package called
intervention/imageto upload to the server. If you have any issue implementing the above code, feel free to drop a comment. Feedbacks are highly appreciated.


