
I have been working with queue in laravel 5 lately and I think it’s good to write an article about it. Queue as the name suggests, helps in the asynchronous process by putting heavy tasks on the stack and dispatching these task after sometimes.
In this article, queuing will be used for sending verification email after registration in laravel. We will use the default laravel authentication system. Also, We will be using Laravel 5.5 for this purpose. There are various drivers that are used for queuing namely Beanstalk, Amazon SQS, Redis, and database. We will use database driver for queuing.
Create Project
You can simply create project through composer as below:
composer create-project laravel/laravel kodementor
Setup Database
We will create a mysql database named kodementor. So, my setup for database in .env looks:
DB_CONNECTION=mysql
DB_HOST=127.0.0.1
DB_PORT=3306
DB_DATABASE=kodementor
DB_USERNAME=root
DB_PASSWORD=secret
Create Authentication
As said earlier, we will use Laravel default authentication system. We can create authentication through artisan command as below:
php artisan make:auth
This will create a folder in App/Http/Controllers directory named Auth folder where controllers for login and registration are stored. Similarly, it also create view files inside Resources/views directory.
Queue Driver Setup
Now, we will setup our database driver for queue. Since, we are using Database driver, we only need to change one line of code. Open your .env file and change the QUEUE_DRIVER to database
QUEUE_DRIVER=database
Create Migration for Queue Jobs
Let’s create two migrations; one for creating table that holds our jobs and other for creating table that holds failed jobs. Run the following command:
For Queue Table
php artisan queue:table
For Failed Queue Table
php artisan queue:failed-table
Now, simply run the migration
php artisan migrate
Mail Server Setup
We are testing our mail function in localhost, so we will use mailtrap. Mailtrap is a fake SMTP server for development teams to test, view and share emails sent from the development and staging environments without spamming real customers.
Go to www.mailtrap.io and get your username and password. Use this username and password on your .env file.
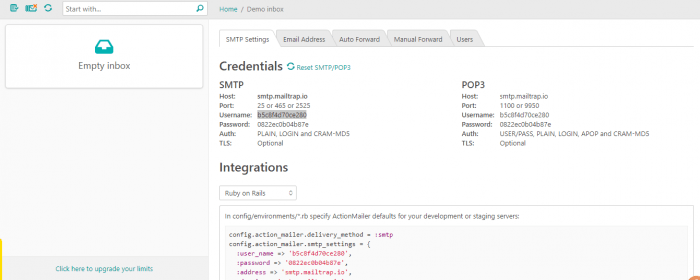
So, your .env setup looks like below:
MAIL_DRIVER=smtp
MAIL_HOST=smtp.mailtrap.io
MAIL_PORT=2525
MAIL_USERNAME=b5c8f4d70ce280
MAIL_PASSWORD=0822ec0b04b87e
MAIL_ENCRYPTION=null
Create Mailable
In Laravel, each type of email sent by your application is represented as a “mailable” class. These classes are stored in the app/Mail directory. Don’t worry if you don’t see this directory in your application since it will be generated for you when you create your first mailable class using the make:mail command:
php artisan make:mail WelcomeUser
Let’s edit our build method to make it use of appropriate template.
//App\Mail\WelcomeUser.php
markdown('emails.welcome');
    }
}
We also have mail template to use inside resources/views/emails/welcome.blade.php. Markdown mailables use a combination of Blade components and Markdown syntax which allow you to easily construct mail messages while leveraging Laravel’s pre-crafted components:
@component('mail::message')
Hello,

Welcome to our website.

@component('mail::button', ['url' => ''])
Learn More
@endcomponent

Thanks,

{{ config('app.name') }}
@endcomponent
You can learn more details about Markdown Mailables at official documentation.https://laravel.com/docs/5.4/mail#markdown-mailables
Create Jobs
By default, all of the queueable jobs for your application are stored in the app/Jobs directory. If the app/Jobs directory doesn’t exist, it will be created when you run the make:job Artisan command. Run below command to create a job.
php artisan make:job WelcomeEmailJob
Job classes are very simple, normally containing only a handle method which is called when the job is processed by the queue. Lets edit to fit our match.
user = $user;
    }

    /**
     * Execute the job.
     *
     * @return void
     */
    public function handle()
    {
        \Mail::to($this->user)->send(new App\Mail\WelcomeUser());
    }
}
Dispatch Job
We have completed our all setup. Now, it’s time to dispatch our job. Since, we will send welcome email after user register. To run our job, execute the following command.
dispatch(new WelcomeEmailJob($user));
Laravel uses RegistersUsers.php trait for registration. So, our code looks as below:
/**
 * Handle a registration request for the application.
 *
 * @param  \Illuminate\Http\Request  $request
 * @return \Illuminate\Http\Response
 */
public function register(Request $request)
{
    $this->validator($request->all())->validate();

    event(new Registered($user = $this->create($request->all())));

    //send welcome emails
    \WelcomeEmailJob::dispatch($user);

    $this->guard()->login($user);

    return $this->registered($request, $user)
                    ?: redirect($this->redirectPath());
}
Running The Queue Worker
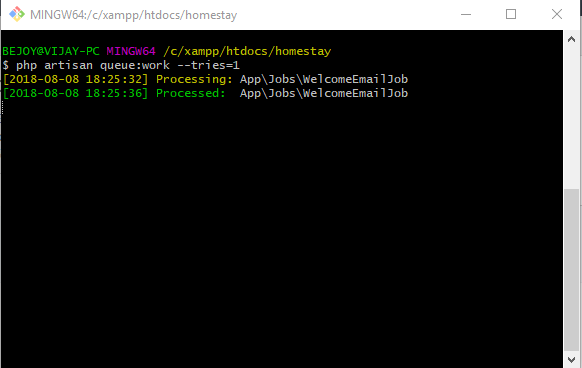
Laravel includes a queue worker that will process new jobs as they are pushed onto the queue. You may run the worker using the queue:work Artisan command. Note that once the queue:work command has started, it will continue to run until it is manually stopped or you close your terminal:
php artisan queue:work
This will run listen to our job. You will get like following message.
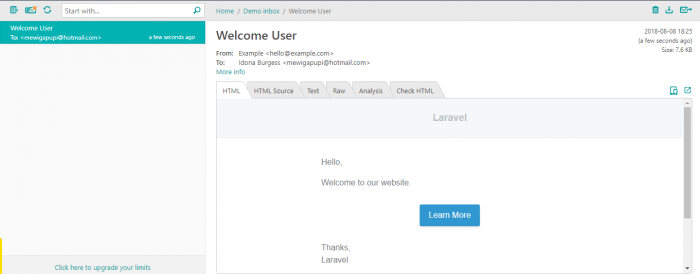
This will send us mail in our mailtrap inbox.
Additional Customization
Delayed Dispatching
We can delayed the execution of queued jobs using delay method.
dispatch(new WelcomeEmailJob($user))
                ->delay(now()->addMinutes(10));
Job Chaining
You can stop the execution of job after job execution is failed. This can be achieved by withChain method.
ProcessPodcast::withChain([
    new OptimizePodcast,
    new ReleasePodcast
])->dispatch();
Specifying Max Job Attempts
We can moreover specify the maximum time for job attempts. for this, you need to give tries when you listen to the jobs.
php artisan queue:work --tries=2
Processing single job
The --once option may be used to instruct the worker to only process a single job from the queue:
php artisan queue:work --once
Queue Priorities
We can prioritize our jobs. To do this, we can set as below:
dispatch((new Job)->onQueue('high'));
To execute jobs in sequence from high priority to low priority, we can setup as below:
php artisan queue:work --queue=high,low
Restart Queue
the simplest way to deploy an application using queue workers is to restart the workers during your deployment process. You may gracefully restart all of the workers by issuing the queue:restart command:
php artisan queue:restart
It’s a great idea to use Queue for heavy task such as mail and uploading pictures.


