
Laravel Homestead is an official, pre-packaged Vagrant “box” that provides you a wonderful development environment without requiring you to install PHP, HHVM, a web server, and any other server software on your local machine. So, working in Homestead becomes easier and more efficient. Homestead runs on any Windows, Mac, or Linux system. Installing and configuring Homestead in windows is easy and requires Virtual box and Vagrant.
Benefits of using Homestead
- It’s Fast and Easy to Set Up Setting Homestead up really easy as fast. All you need to do is add the homestead box to your Vagrant and clone the repo.
- Easy to add sites Homestead offers simplicity. Because of configuration in Homestead, adding new sites is super easy and can easily be changed whenever needed.
- It Works Unlike the other popular solutions out there for simplifying Vagrantfile setups, Homestead seldom fails to boot, and if it does, it’s fixed within minutes.
- Ports Homestead opens certain important ports by default which make maintaining and managing your database and other installed software on the VM from the host machine a super easy.
- SSH on Virtual Machine SSH will make the machine adjustments easy and quick. Using SSH actually helps in getting the additional software installed and nginx files and another server to offer additional services to your machine.
- Same as Production When you use it for simulating how your site would look on the production side. It gets you to know the important errors that you might come across while publishing this site on a public server.
Installing Required Software
Before launching your Homestead environment in windows, you must install VirtualBox and Vagrant.
VirtualBox
It helps to manage another operating system inside your windows operating system. You can download the software for windows host from this download page.
Vagrant
Vagrant is a tool for building and managing virtual machine environments in a single workflow. With an easy-to-use workflow and focus on automation, Vagrant lowers development environment setup time, increases production parity. You can download this application for windows from this vagrant official download page.
Git for Windows
Git for Windows provides a BASH emulation used to run Git from the command line. *NIX users should feel right at home, as the BASH emulation behaves just like the “git” command in LINUX and UNIX environments. You can download Git for Windows from this download link
Note: In Windows, you may need to enable hardware virtualization (VT-x). It can be enabled via your BIOS setup.
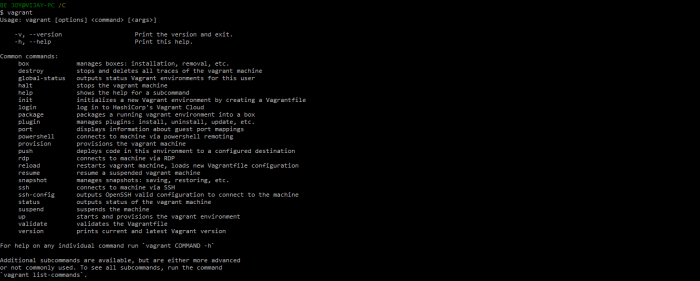
You can test if vagrant is successfully installed in your system by typing the following command and it will output the result as:
$ vagrant
Output:
Adding Homestead to Vagrant
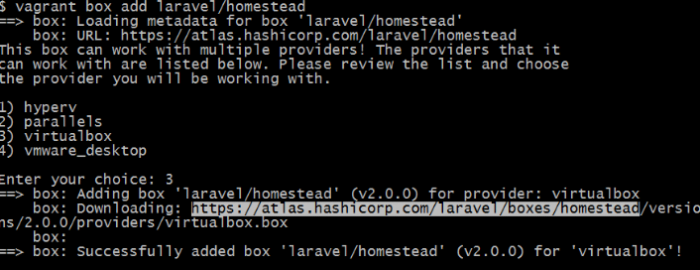
After installing the above-mentioned softwares, you need to add the laravel/homestead box to your Vagrant installation. To do so, run the below command:
vagrant box add laravel/homestead
It may take a few minutes depending on your internet connection speed. After loading metadata, you will be prompted to select your choice for Hyperv, Parallels, Virtualbox or vmware_desktop, enter 3 and hit Enter.
Clone Homestead Repo
Now, open Git Bash in your desired directory and clone the Homestead Repository by running the command:
git clone https://github.com/laravel/homestead.git Homestead
Go inside Homestead directory and double click on file: init.bat. This will create a configuration file called Homestead.yaml in this directory.
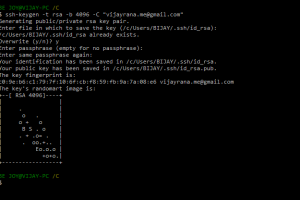
Creating SSH Key
We need to create a SSH key. Enter the command:
ssh-keygen -t rsa -b 4096 -C "your_email@example.com
Output:
Configuring Homestead.yaml File
Open your Homestead.yml file which is inside Homestead directory. It looks like:
---
ip: "192.168.10.10"
memory: 2048
cpus: 1
provider: virtualbox
authorize: ~/.ssh/id_rsa.pub

keys:
    - ~/.ssh/id_rsa

folders:
    - map: ~/Code
      to: /home/vagrant/Code

sites:
  - map: homestead.app
    to: /home/vagrant/Code/Laravel/public

databases:
    - homestead

# blackfire:
#- id: foo
#token: bar
#client-id: foo
#client-token: bar

# ports:
# - send: 50000
# to: 5000

#- send: 7777
# to: 777
# protocol: udp
So, what are these settings:
ip: The local ip address the virtual machine will respond to which should be used in your hosts file.
memory: Amount of RAM in megabytes available for the virtual machine. By default set to 2 GB.
cpus: number of processors to be used on the virtual machine.
provider: The virtualization system to use. By default configured already for VirtualBox.
authorize: Location of our SSH public key. The tilde (~) shortcut to point to our user’s home folder is recognized here as well.
keys: Here we specify the path of the private SSH key.
folders: this is where we specify which folders in Windows should be synchronized with the virtual machine. –map: some-path is the path to all of your projects root directory.
sites: This is where you will map the domains of each application you want to run with Homestead. databases: The list of MySQL databases you want Homestead to create when it boots.
Since I have cloned the Homestead in G:/ directory and made a project direct name www directory. So, my Homestead.yaml files look like below. You can have your own setting.
---
ip: "192.168.10.10"
memory: 2048
cpus: 2
provider: virtualbox
name: vijayranavm
hostname: vijayvm

authorize: ~/.ssh/id_rsa.pub

keys:
 - ~/.ssh/id_rsa

folders:
 - map: G:\www
   to: /var/www

sites:
 - map: blog.local
   to: /var/www/blog.local/public
   type: apache
   php: "5.6"

databases:
#
 - blog
You can add as many sites as you like and don’t forget to add the domain to your host file which is located in <pre>C:\Windows\System32\drivers\etc\</pre> directory. For example:
192.168.10.10 blog.local
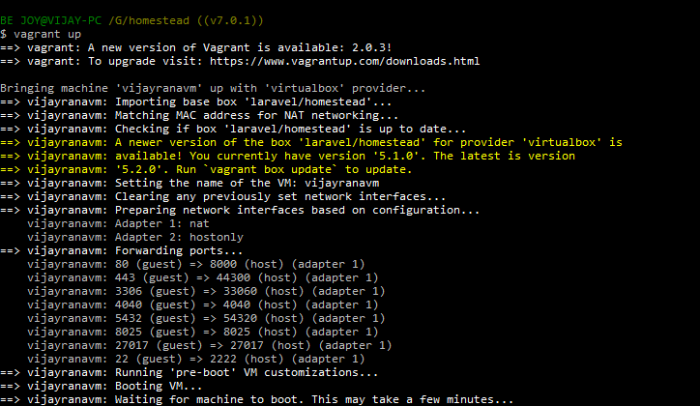
Start Homestead
Now, you can boot our homestead using vagrant box by running the command from your Homestead directory.
vagrant up
Output:
Using SSH inside Virtua Machine
You can simply use SSH inside your virtual machine by connecting to it typing the following command.
vagrant ssh
Output:
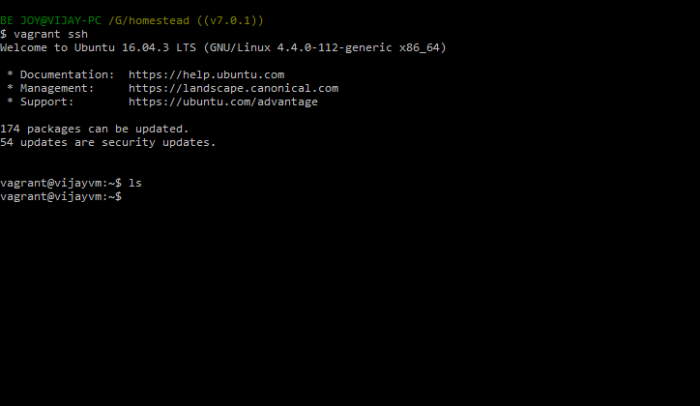
Now, to go to your project folder, simply type following in command and hit enter.
cd /var/www/
Note: www is my project directory as mentioned in Homestead.yaml file. When you enter the command ls on your terminal, you will see a list of your projects if you have any.
Creating First laravel project
Now, you can create a project here just typing:
composer create-project laravel/laravel myfirstapp --prefer-dist
And build your amazing application :).
If you want to build simple crud application example, you can read the article – Laravel 5.7 CRUD example from scratch


