
Notification is one of the best features in Laravel which was introduced in Laravel 5.3 and later. This feature allows us to send notification of events to the user. We can send notification through emails, SMS, and Slack. Also, notifications can be stored in our database that can be accessed later.
In this article, we will implement this email notification feature of laravel in our project. We will send a welcome message to the user through email notification. Let’s start coding!
Project Setup
You can start with the fresh installation of laravel or with an existing project.
Database
For database setup, just create a database and configure .env file.
DB_CONNECTION=mysql
DB_HOST=127.0.0.1
DB_PORT=3306
DB_DATABASE=kodementor
DB_USERNAME=root
DB_PASSWORD=secret
Email
For testing purpose, we will use mailtrap.io. If you are not familiar with this, just go to mailtrap.io and register your account. After registration, you will get username and password. After it, configure your .env file.
MAIL_DRIVER=smtp
MAIL_HOST=smtp.mailtrap.io
MAIL_PORT=2525
MAIL_USERNAME=fc9a75s7e48a54a
MAIL_PASSWORD=131ea2f702b46f4
MAIL_ENCRYPTION=null
Authentication
We will use laravel default authentication for our project. We will create authentication scaffolding using following artisan command:
php artisan make:auth
Create Notification
As said earlier, we will send welcome email to the user after registration. For this, we create a new notification with artisan command:
php artisan make:notification AccountCreated
This will create a new file AccountCreated in App/Notification/ directory. If you dig into that file, you need to note two methods i.e. via method and toMail method.
The via method is used to determine which channels the notification will be delivered like emails, SMS and Slack.
The toMail method is used to send notification through email. Similar this this, you may add toDatabase. This acts as a API for rapidly building emails. It encapsulates the entire process of building an email template. It has different calls like subject, greeting, level, line, action and salutation.
We will change this file so that it sends an email that looks like a welcome email. So, our final code looks like below:
user = $user;
    }

    /**
     * Get the notification's delivery channels.
     *
     * @param  mixed  $notifiable
     * @return array
     */
    public function via($notifiable)
    {
        return ['mail'];
    }

    /**
     * Get the mail representation of the notification.
     *
     * @param  mixed  $notifiable
     * @return \Illuminate\Notifications\Messages\MailMessage
     */
    public function toMail($notifiable)
    {
        return (new MailMessage)
            ->subject('Account Created in KodeMentor') // Subject of email
            ->greeting('Hello '.$this->user->name) // Greeting to User like: Dear Sir, Hello Madam, etc ...
            // ->level('info')// what kind of email. Available options: info, success, error. Default: info
            ->line('Welcome to KodeMentor. We are glad to have you on board.') //email body
            ->action('Browse Articles', url('https://vijayrana.com.np/blog/'))  //button in email
            ->line('Thank you for using our application!');
            // ->salutation('')  // example: best regards, thanks, etc ...
    }

    /**
     * Get the array representation of the notification.
     *
     * @param  mixed  $notifiable
     * @return array
     */
    public function toArray($notifiable)
    {
        return [
            //
        ];
    }
}
Configure Model
To use notification, respective model should use Notifiable trait. Since, we are using User model to send notification, we will have default setup for this. So, we don’t need to change anything. But, if you intend to use in other model (which we should do), you should user Notifiable trait.
Firing Notification
Now, it's time to fire our notification. We will fire notification from
RegisterControllerafte user detail has been saved to database. We can fire notification usingnotifymethod.use App\Notifications\AccountCreated; $user->notify(new AccountCreated($user));We can also fire using Notification Facade. This is useful primarily when you need to send a notification to multiple notifiable entities such as a collection of users.
use App\Notifications\AccountCreated; Notification::send($users, new ArticlePublished($article));Since, we will fire this notification after user is created, we need to modify our
createmethod only. Thus, ourcreatemethod inRegisterController.phplooks like below:// App/Http/Controllers/Auth/RegisterController.php // don't forget to import AccountCreated class // by using "use App\Notifications\AccountCreated;" on top protected function create(array $data) { $user = User::create([ 'name' => $data['name'], 'email' => $data['email'], 'password' => bcrypt($data['password']), ]); $user->notify(new AccountCreated($user)); return $user; }Testing
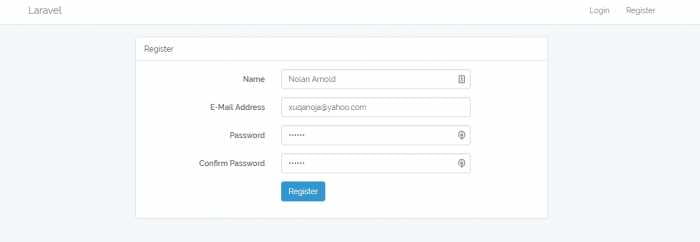
Now, our application is ready to fire notification. Let's test our application by creating new user.
After the user has been created, we will get an email notification:
Additional Configurations
Here are some of the additonal features we can add to this notification.
Queuing Notification
Similar to jobs, we can put our notification in queue. For this, we need to implementShouldQueueinterface andQueueabletrait. For example:The default email template we are using is
notifications/emails.php. If you wish to customize your own email template, you can publish email template and modify as per your requirements. To publish it, run the below artisan command:php artisan vender:publishThis will publish your
email.phptemplate inresources/views/vendor/notifications/directory. You can change this file and test.Conclusion
This is all for email notification in laravel. I hope you have got a clear idea about notification. In the next article, we will talk about sending notification through slack. Thank you for reading this article. If you have any comment or feedback, please feel free to drop a comment.


